页面配置
本主题默认支持并使用以下页面类型。
你可能需要先了解 Hexo 的 Front-matter
如果想要让扩展页面链接(如:Girls, 相册等)显示在侧边栏中,你还需要配置一下导航 侧边栏 - 页面链接。
文章
额外的头部字段
author: 设置作者则会显示email: 自动根据邮箱获取 Gravatar 头像toc: 是否显示目录(文章post默认显示,页面post默认不显示)readmore: 将会首页卡片摘要末尾强制显示一个阅读更多按钮hideTime: 强制隐藏时间显示
---
title: xxx
author: 云游君
email: me@yunyoujun.cn
readmore: true
hideTime: true
---
---
title: xxx
author: 云游君
email: me@yunyoujun.cn
readmore: true
hideTime: true
---description: 描述(只出现在预览卡片上,不出现在正文中)(默认使用400字重以表强调,略细于加粗字体)excerpt: 摘要(不需要在Front-matter中设置,通过<!-- more -->截断实现,预览卡片与正文中均出现)
---
title: xxx
description: xxxxxxx
---

这里是摘要

<!-- more -->

这里是更多内容
---
title: xxx
description: xxxxxxx
---
这里是摘要
<!-- more -->
这里是更多内容图片注释
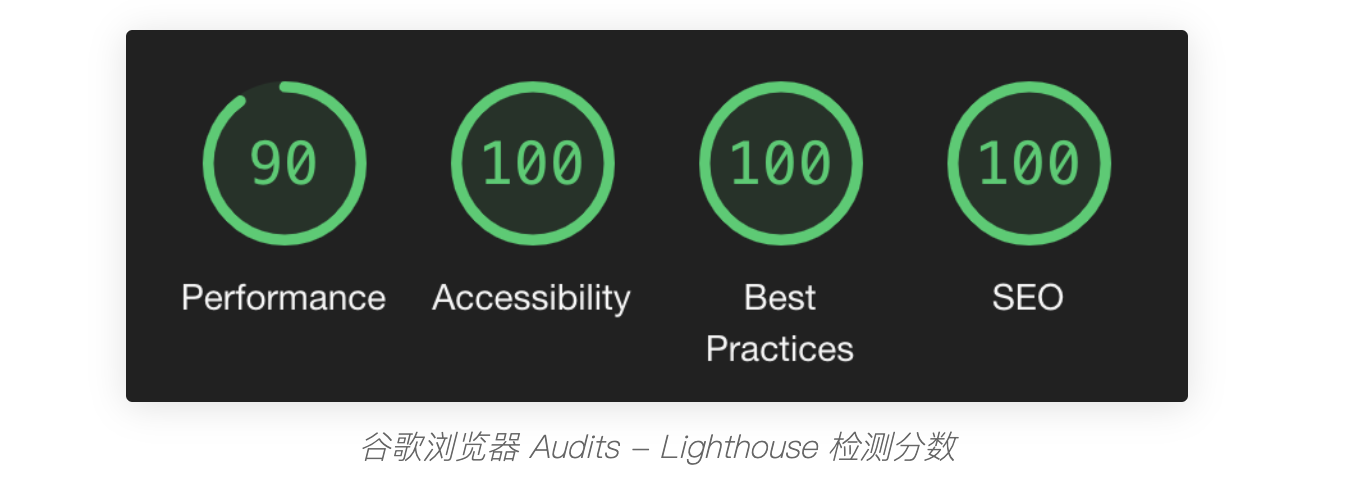
你可以遵循如下写法来对图片进行注释。
_谷歌浏览器 Audits - Lighthouse 检测分数__谷歌浏览器 Audits - Lighthouse 检测分数_
页面
通用页面的配置。
title: 设置页面标题(可以对默认标题进行覆盖)icon: 页面标题前的图标
标签、分类、相册等页面未设置标题时将默认使用语言包中的翻译(显示对应语言的
标签/分类/相册等。) 你可以通过设置title来覆盖这些页面的标题。
譬如:
---
title: xxx
icon: ri:women-line
---
---
title: xxx
icon: ri:women-line
---图标效果可见: Lovely Girls
标签 tags
如果您尚未安装 hexo-generator-tag,请输入 npm install hexo-generator-tag。
新建 tags 页面,在博客根目录下输入:
hexo new page tagshexo new page tags修改 source/tags/index.md 的 Front Matter
---
date: 2017-10-09 19:11:58
comments: false
type: tags
---
---
date: 2017-10-09 19:11:58
comments: false
type: tags
---你可以在 _config.yun.yml 中设置:
wordcloud:
enable: truewordcloud:
enable: true来使用彩色的词云替代原生的标签云。
仅会在标签页自动引入 wordcloud2.js
分类 categories
如果您尚未安装 hexo-generator-category,请输入 npm install hexo-generator-category。
新建 categories 页面,在博客根目录下输入:
hexo new page categorieshexo new page categories修改 source/categories/index.md 的 Front Matter
---
date: 2017-10-12 10:47:16
comments: false
type: categories
---
---
date: 2017-10-12 10:47:16
comments: false
type: categories
---归档 archives
Hexo 默认支持
本主题采用时间轴的形式重写
关于 About
关于你
默认点击自己的头像或者名称会进入关于页面。
你需要新建好你的关于页面。
hexo new page abouthexo new page about然后就开始介绍你自己吧~
关于站点
主题将根据
source/about/site.md是否存在,决定是否渲染侧边栏中关于站点的超链接。
此外点击侧边栏中的站点名称,会进入关于站点页面。
你可以在 source/about 文件夹下新建 site.md 来介绍你的站点。
譬如记载站点的变迁历史,我觉得和关于自己放在一起可能会互相干扰,就分开了。
404
你需要先新建 404 页面。可以直接在 source 目录下新建 404.md。
---
layout: 404
title: 四大皆空
permalink: /404.html
reward: false
---
---
layout: 404
title: 四大皆空
permalink: /404.html
reward: false
---只有当你将其部署到 GitHub Pages 上,你访问不存在的页面才会显示。
Example: https://www.yunyoujun.cn/404.html
在本地,你也可以直接访问 /404.html 查看效果。
友链 links
新建友链页面
hexo new page linkshexo new page links进入 source/links/index.md,设置 links 字段。
url: 博客链接avatar: 头像图片链接name: 怎么称呼?blog: 站点名称desc: 一句话描述color: 代表色,默认是灰色gray
你可以进入 我的小伙伴们 查看效果
tip: 友链未加载成功时的文字提示,加载完后会被移除。(仅当通过 JSON 加载友链时生效。)
---
layout: links
title: 我的小伙伴们
date: 2019-06-21 13:06:06
keywords: 链接
description: 云游的小伙伴们
comments: true
links:
  - url: https://yunyoujun.cn
    avatar: https://cdn.jsdelivr.net/gh/YunYouJun/yunyoujun.github.io/images/avatar.jpg
    name: 云游君
    blog: 云游君的小站
    desc: All at sea.
    color: '#0078e7' # 代表色
    email: # 非必须
placeholder: 还没想好说些什么 # 默认对友链的描述
tip: 友链加载中~如失败请刷新重试~
---
---
layout: links
title: 我的小伙伴们
date: 2019-06-21 13:06:06
keywords: 链接
description: 云游的小伙伴们
comments: true
links:
- url: https://yunyoujun.cn
avatar: https://cdn.jsdelivr.net/gh/YunYouJun/yunyoujun.github.io/images/avatar.jpg
name: 云游君
blog: 云游君的小站
desc: All at sea.
color: '#0078e7' # 代表色
email: # 非必须
placeholder: 还没想好说些什么 # 默认对友链的描述
tip: 友链加载中~如失败请刷新重试~
---让友链显示在侧边栏中 侧边栏 - 页面链接
随机友链
想要启用随机友链,你必须将其改为外置的 JSON 加载方式。
譬如:https://cdn.jsdelivr.net/gh/YunYouJun/friends@gh-pages/links.json
你可以参考我的 YunYouJun/friends 来自动生成你友链的 JSON 数据格式。 (当然你自己手写存放在本地也可以。)
random: 随机友链顺序,默认未开启
---
layout: links
title: 我的小伙伴们
date: 2019-06-21 13:06:06
keywords: 链接
description: 云游的小伙伴们
comments: true
links: https://cdn.jsdelivr.net/gh/YunYouJun/friends@gh-pages/links.json
random: true
---
---
layout: links
title: 我的小伙伴们
date: 2019-06-21 13:06:06
keywords: 链接
description: 云游的小伙伴们
comments: true
links: https://cdn.jsdelivr.net/gh/YunYouJun/friends@gh-pages/links.json
random: true
---当您尝试手动自定义 JSON,请保证随机友链的格式正确。
创建一个新的 JSON 文件,如 source/links.json。
模板:
[
  {
    "url": "博客链接",
    "avatar": "头像地址",
    "name": "作者昵称",
    "blog": "博客名称",
    "desc": "描述",
    "color": "主题色",
    "email": "电子邮箱(非必需)"
  }
]
[
{
"url": "博客链接",
"avatar": "头像地址",
"name": "作者昵称",
"blog": "博客名称",
"desc": "描述",
"color": "主题色",
"email": "电子邮箱(非必需)"
}
]例如:
[
  {
    "url": "https://www.yunyoujun.cn",
    "avatar": "https://cdn.jsdelivr.net/gh/YunYouJun/yunyoujun.github.io/images/avatar.jpg",
    "name": "云游君",
    "blog": "云游君的小站",
    "desc": "All at sea.",
    "color": "#0078e7",
    "email": "me@yunyoujun.cn"
  }
]
[
{
"url": "https://www.yunyoujun.cn",
"avatar": "https://cdn.jsdelivr.net/gh/YunYouJun/yunyoujun.github.io/images/avatar.jpg",
"name": "云游君",
"blog": "云游君的小站",
"desc": "All at sea.",
"color": "#0078e7",
"email": "me@yunyoujun.cn"
}
]注意:你使用 jsdelivr 可能会因为 CDN 有所延迟。 你也可以像我一样使用自定义域名。https://friends.yunyoujun.cn/links.json
Girls
记录喜欢的女孩子们
页面示例:https://yunyoujun.cn/girls/
先设置开启。(我知道大多数人,可能并不会使用这个功能。所以默认是关闭的。)
当关闭时,该页面的 CSS 文件也不会被打包进最后的 CSS 文件。所以不用担心本主题该功能会影响加载速度。
girls:
enable: truegirls:
enable: truehexo new page girlshexo new page girls进入 source/girls/index.md
---
layout: girls
title: 可爱的女孩子
banner: <span title="大家都是我的天使!">排名不分先后</span>
girls:
  - name: 名称
    avatar: 头像图片链接
    from: 出自什么作品
    url: 人物百科链接
    reason: 喜欢的理由
---
---
layout: girls
title: 可爱的女孩子
banner: <span title="大家都是我的天使!">排名不分先后</span>
girls:
- name: 名称
avatar: 头像图片链接
from: 出自什么作品
url: 人物百科链接
reason: 喜欢的理由
---当你不输入
url人物百科链接时,会自动将人物名与萌娘百科前缀拼接以获得人物百科链接。
可参考我的配置。
如果想要让 Girls 显示在侧边栏中,你还需要配置一下导航 侧边栏 - 页面链接。
相册 albums
存在一个相册主页,放置多个相册,点击进入相册查看更多照片。
在 _config.yun.yml 中开启相册功能。
albums:
enable: truealbums:
enable: true如果想要让相册显示在侧边栏中,你还需要配置一下导航 侧边栏 - 页面链接。
相册集
相册集是相册的导航页面,你可以在此放置多个相册。
新建相册集页面
hexo new page albumshexo new page albums进入 source/albums/index.md,设置 type,和添加相册链接、封面等。
caption: 相册标题url: 相册链接cover: 相册封面(最好使用http或https开头的链接形式)desc: 相册描述
---
type: albums
albums:
  - caption: 夕阳西下
    url: /albums/sunset.html
    cover: https://interactive-examples.mdn.mozilla.net/media/examples/elephant-660-480.jpg
    desc: 我想起那天夕阳下的奔跑
---
---
type: albums
albums:
- caption: 夕阳西下
url: /albums/sunset.html
cover: https://interactive-examples.mdn.mozilla.net/media/examples/elephant-660-480.jpg
desc: 我想起那天夕阳下的奔跑
---相册页
相册页,才是你真正存放照片的地方。
使用 lightgallery.js 实现,仅在相册页才会加载该类库。
新建相册页面。
你只需在上面新建好的 albums 文件夹中,继续创建 md 文件,譬如新建 sunset.md。
或通过命令行新建:
hexo new page --path albums/sunset "夕阳"hexo new page --path albums/sunset "夕阳"进入 sunset.md 文件,进行修改。
注意:这里是
layout而不是type。
TIP
你还可以设置 gallery_password 来对相册进行加密。(记得将你的仓库设置为私有。)
没有直接命名为 password 以防止与 hexo-blog-encrypt 插件关键字 password 冲突。
因为使用了 crypto-js,所以你还需要
npm install crypto-js。
测试页面:https://hexo-theme-yun.yunyoujun.cn/albums/sunset.html 测试密码:test
如果你发现在
hexo s并开启了 PJAX 时,无法正常解密相册,不用担心,这是 Hexo 作为服务器时,对链接又重新加密了一遍,生成静态文件部署时是没有问题的。
---
title: 夕阳
date: 2020-04-18 16:27:24
updated: 2020-04-18 16:27:24
layout: gallery
password: test
photos:
  - caption: 我
    src: https://interactive-examples.mdn.mozilla.net/media/examples/elephant-660-480.jpg
    desc: 我想起那天夕阳下的奔跑
  - caption: 想起
    src: https://i.picsum.photos/id/198/510/300.jpg
    desc: 那是我逝去的青春
---
---
title: 夕阳
date: 2020-04-18 16:27:24
updated: 2020-04-18 16:27:24
layout: gallery
password: test
photos:
- caption: 我
src: https://interactive-examples.mdn.mozilla.net/media/examples/elephant-660-480.jpg
desc: 我想起那天夕阳下的奔跑
- caption: 想起
src: https://i.picsum.photos/id/198/510/300.jpg
desc: 那是我逝去的青春
---为什么使用相册集作为
albums,gallery作为相册 ? What is the Difference Between Albums vs Galleries in WordPress
Slides 幻灯片
你可以使用 Markdown 混合 Html 来快速编写你的幻灯片。
source 下新建 slides/test.md。
或者命令:
hexo new page --path slides/test "测试 Slides"hexo new page --path slides/test "测试 Slides"进入 test.md,修改头部如下(遵循对应语法即可开始编辑你的 Slides 文件)
---
title: Color Dust
date: 2020-06-23 16:27:24
updated: 2020-06-23 16:27:24
layout: slide
slide:
  theme: white
  config:
    history: true
    mouseWheel: true
---
---
title: Color Dust
date: 2020-06-23 16:27:24
updated: 2020-06-23 16:27:24
layout: slide
slide:
theme: white
config:
history: true
mouseWheel: true
---接着直接在下方用 Markdown 开始编写你的 Slides 文件吧。
## Slide 1

## A paragraph with some text and a [link](http://hakim.se).

## Slide 2

---

## Slide 3
## Slide 1
## A paragraph with some text and a [link](http://hakim.se).
## Slide 2
---
## Slide 3我的一个 Slides 示例:
通用配置
默认水平分页分隔符为 ---,垂直分页分隔符为 ~~,笔记开始关键字为 Note:。
按 S 开启演讲者模式。
主题为 white,更多主题名称。
config 对应更多配置。
slide:
  separator: ---
  separator_vertical: ~~
  data_separator_notes: '^Note:'
  theme: white
  config:
    history: true
mouseWheel: falseslide:
separator: ---
separator_vertical: ~~
data_separator_notes: '^Note:'
theme: white
config:
history: true
mouseWheel: false至于想要 Slides 的列表嘛,自己建个
source/slides/index.md在里面列吧。